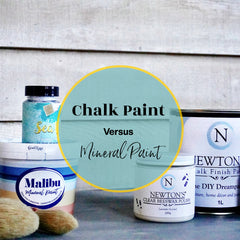
Chalk Paint 101:
Getting Back to Basics for a New Creative Adventure
Introduction
Have you ever wanted to dive into the world of furniture painting and upcycling, but felt overwhelmed by the myriad options and steps involved? Well, chalk paint might just be the perfect solution for you! In this article, we will explore the basics of chalk paint and how it compares to traditional furniture paint products, like acrylic paints. Discover why chalk paint is quickly gaining popularity among DIY enthusiasts and why you should consider giving it a try for your next project.
What is Chalk Paint?
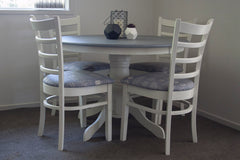
Chalk paint is a unique type of paint that provides a rich, matte finish, and is perfect for those looking to achieve a vintage, shabby chic, or distressed look. Its versatility and ease of use make it an ideal choice for both beginners and experienced DIY-ers. Chalk paint is made from a combination of natural compounds (60%) and renewable resources (30%), making it an environmentally friendly and non-toxic option for your home projects.
Benefits of Chalk Paint vs. Acrylic Paints
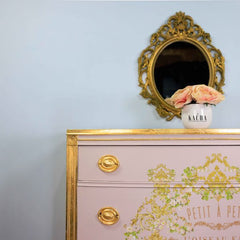
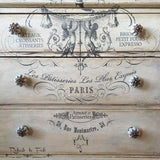
Effortless Vintage and Distressed Looks: Chalk paint allows you to create a wide range of effects, from washed to distressed or shabby chic. This versatility makes it easier to achieve the look you desire without the need for advanced painting techniques or multiple layers of paint.
No Preparation Required: Unlike acrylic paint, which often requires surface preparation such as sanding or priming, chalk paint can be applied directly to most surfaces without any prior prep work. This means you can get started on your project right away, saving time and effort.
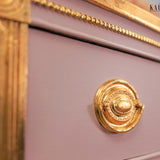
Matte Finish: Chalk paint dries to a beautiful, velvety matte finish, which adds a touch of sophistication and charm to your furniture pieces. This distinct appearance sets it apart from the glossy or satin finishes typically associated with acrylic paints.
Eco-friendly and Non-toxic:
As mentioned earlier, chalk paint is made from natural compounds and renewable resources, making it an environmentally responsible choice. Its non-toxic formulation also ensures that your painting projects are safe for you, your family, and your pets.
Versatility: Chalk paint can be used on a wide variety of surfaces, including walls, floors, and even fabric. This versatility allows you to get creative and transform not only furniture but also entire rooms with a single type of paint.
Layering and Distressing: The unique properties of chalk paint make it easy to layer multiple colours and distress the top layers to reveal the colours underneath. This technique adds depth and character to your projects, creating one-of-a-kind pieces with a vintage flair.
Coverage: Chalk paint provides impressive coverage, with a single litre of paint covering approximately 10-15 square meters of surface area (depending on the porosity and texture of the surface). This means you can tackle larger projects with less paint, making it a cost-effective option.
Guide: How to Chalk Paint Furniture
Before diving into our conclusion, let's walk you through a comprehensive guide on how to chalk paint furniture. Follow these simple steps to transform your piece of furniture into a stunning work of art.
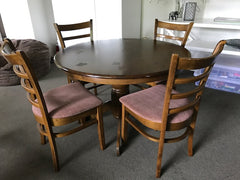
Step 1: Choose and Prepare Your Piece of Furniture

Select a piece of furniture that you want to transform using chalk paint. Although chalk paint requires little to no preparation, it's still a good idea to clean the surface with a damp cloth to remove any dust or grime. Allow the furniture to dry completely before moving on to the next step.
Step 2: Gather Your Supplies
To chalk paint your furniture, you'll need the following supplies:
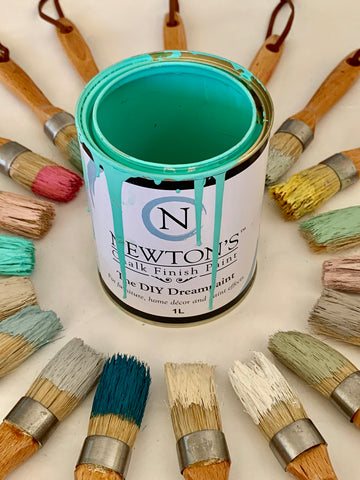
- Newton's Chalk Finish paint in your chosen colour(s)
- A paintbrush (our Italian Oval Chalk Paint brushes work well)
- A soft cloth or rag for wiping
- Fine-grit sandpaper (220-320 grit) for distressing (optional)
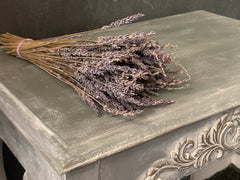
- A clear wax such as our Lavender scented beeswax or our Newton's Varnish sealant (optional, but recommended for protection)
Step 3: Paint Your Furniture
Shake or stir your chalk paint well before using it. Apply the paint in thin, even coats, moving your brush in the same direction as the wood grain. Allow the first coat to dry completely (usually 1-2 hours, depending on the brand) before applying a second coat, if necessary.
Step 4: Distressing (Optional)
If you want to achieve a distressed look, use fine-grit sandpaper to gently sand the areas where natural wear and tear would occur, such as edges, corners, and raised details. The goal is to remove some of the top layers of paint, revealing the original surface or the base paint colour underneath. Make sure to sand lightly and evenly to achieve a natural, aged look. Wipe off any dust with a soft cloth.
Step 5: Sealing and Waxing (Optional, but Recommended)
To protect your newly painted furniture and enhance its durability, apply our Clear Lavender scented Beeswax or Newton's Varnish. This step is particularly important for high-traffic or frequently used pieces like tables and chairs.
For waxing, use a Wax brush or a lint-free cloth to apply a thin layer of clear furniture wax. Work in small sections, applying the wax in a circular motion, and then immediately wiping off the excess with a clean cloth. Allow the wax to dry for 24 hours before buffing it to a soft sheen with a clean, lint-free cloth.
For sealing with a Newton's Clear Varnish follow the manufacturer's instructions for application. Typically, you'll use a Varnish brush a roller or foam applicator to apply a thin, even coat of the sealant. Allow it to dry according to the recommended drying time, and apply additional coats if necessary for added protection.
Step 6: Enjoy Your Transformed Piece
After completing the painting, distressing, and sealing processes, your furniture is ready for use, but please treat it carefully for the first 3 weeks as the paint will still be curing! Enjoy the fresh, new look of your piece, and don't forget to share your work with friends and family or on social media to inspire others.
Now that you have a comprehensive guide on how to chalk paint furniture, you're well-equipped to take on your next DIY project. Remember, chalk paint is a versatile and user-friendly medium that can help you create stunning transformations with minimal effort. As you gain more experience working with chalk paint, you'll develop your unique style and techniques, allowing you to produce truly one-of-a-kind pieces that showcase your creativity and taste.
We do stock a lot of products that are all designed to enhance your projects, so it is well worth to go down the rabbit hole and peruse our product offerings on this web site!
With chalk paint in your arsenal, the possibilities are endless. You can revitalize old furniture, give new life to thrift store finds, or create customized pieces that perfectly complement your home's decor. So, gather your supplies, roll up your sleeves, and embark on a fulfilling journey of furniture up cycling and painting with chalk paint.
Conclusion
Chalk paint offers numerous benefits compared to traditional furniture paint products like acrylic paints, making it an ideal choice for those looking to get started in the world of furniture upcycling and painting. With its ease of use, versatility, and environmentally friendly properties, chalk paint is a fantastic option for both beginners and seasoned DIY enthusiasts alike. So, why not give chalk paint a try for your next project and unlock your creative potential? You'll quickly discover that this innovative paint can breathe new life into old furniture pieces and transform your living spaces with minimal effort.
As you embark on your chalk paint journey, don't be afraid to experiment with different techniques and colour combinations. The more you explore, the more you'll find that chalk paint allows you to create stunning, personalized pieces that showcase your unique style and tast
In conclusion, Chalk paint is a game-changer in the world of furniture painting and upcycling. Its ease of use, adaptability, and eco-friendly properties make it an essential tool for any DIY enthusiast. By choosing chalk paint, you're not only creating beautiful, one-of-a-kind pieces but also contributing to a more sustainable future. So, go ahead and give chalk paint a try – you won't be disappointed!
Happy painting!

]]>